


Finding Clear Steps to Install a Replacement Battery
Start with the label on your old pack and our help pages; those answer most installation questions before you pick up a screwdriver. If you are wondering where to find battery installation instructions, the Battery Guides section, the product listing, and our Contact Us team are the places to look.
- The part number on your old pack is the starting point for any install.
- Our Battery Guides and Battery FAQs cover the common questions in plain language.
- A clean bench, a small driver, and a plastic pick handle most swaps.
- Charge the new pack fully, then confirm fit and runtime before reassembly.
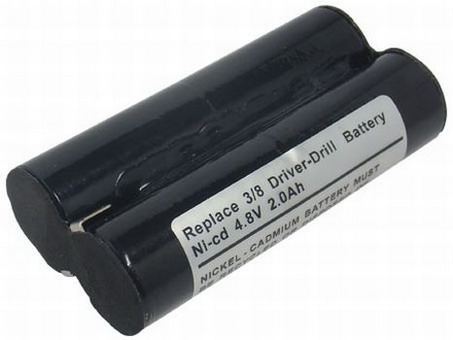
Begin With the Part Number
Before hunting for steps, flip the old pack over and copy its model and part number. That string tells you which tool family the pack belongs to and which connector and voltage the replacement needs. It also makes any instructions you read actually relevant, since guidance for a different tool can send you looking for a battery door that your unit does not have.
Take a photo of the label and keep it open while you read. If the printing has rubbed off, the model plate on the tool or the original charger usually carries the same information. Our product pages list compatibility by part number, and the Contact Us team can check a worn number against your order before anything ships.
The Guides and Help Pages to Use
Our Battery Guides section is the first stop for a general walkthrough, and the Battery FAQs answer the questions that come up mid-install, like why a new pack feels weak on day one. The Payment and Shipping and Return Policy pages are there if an order detail needs checking. Read through the relevant guide once before you start so the steps feel familiar in your hands.
The product listing itself is worth a careful look, since it spells out the voltage, chemistry, and compatibility for that specific pack. If a step in a guide does not match what you see on your bench, stop rather than improvising. Reaching the team through Contact Us is faster than forcing a connector that was never going to seat.
A Simple, Repeatable Install Routine
Most swaps follow the same rhythm. Power the device off, work on a soft cloth under good light, and use a small driver plus a plastic pick rather than anything metal. Note how the old lead is routed, unplug it by the connector, seat the new pack in the same orientation, and tuck the wire back before closing the case.
Give the new cell a full first charge, then run the tool or device unplugged and time how it behaves. Warmth during charging is normal, but real heat is not. If the case will not close, the connector does not match, or the unit stays dark, pause and ask us. A careful ten minutes beats a damaged pack.
When a Replacement Beats Another Repair
If the pack still fades minutes after a full charge, another round of instructions will not bring it back; a fresh cell will. Every pack we sell is a brand new, 100% compatible aftermarket replacement with a 30-day money-back guarantee and a one-year warranty. Match the part number, follow the guide, and keep the old pack until the new one passes a real runtime test.
Find the right replacement battery
Browse the right replacement battery or power tool battery charger and use our guides to install it with confidence.
Frequently asked questions
Do batteries come with printed instructions?
Guidance lives in our Battery Guides section and the Battery FAQs rather than in every box, so check those pages first. The product listing also spells out the compatibility details for your specific pack. If something still is not clear, the Contact Us team can walk you through the step in question.
What tools will I need?
For most small electronics and tool packs, a small Phillips driver, a plastic opening pick, and a soft cloth are enough. Good light and a dish for screws help more than a large kit. Avoid metal prying, which can short a contact or mar the housing.
Should I charge the pack before installing it?
A full first charge is a good habit, since aftermarket cells arrive partly charged and the gauge needs a cycle to settle. Install the pack, charge it fully, then use the device unplugged once and recharge. Runtime usually steadies after the first two or three cycles.
Related reading
Last reviewed by the batteries-company.com editorial team. Brand and model names are used to describe compatibility only; replacement packs are aftermarket products.
Editorial source: Q&A Collection 066 — “Where do I find battery installation instructions” (FAQ #25). See the full collection-to-article map.

 Warehouse address: